How can you create custom boxes?
Creating a custom packaging is an innovative process to market and eventually sell a product.
Before we deal with the ‘how’ to create a custom packaging, let us quickly understand the ‘why’.
Why Should You Use Custom Packaging?
With the growing technology, custom packaging is becoming easier by the day. Not to forget the changing tastes of customer’s preferences.
Innovation leads to more competition and hence providing every customer with the best quality product they can ask for.
Custom product packaging appeals to the eyes of customers. The cost of customization when considered by the customers inclines them to purchase the particular appealing product. Hence the best packaging needs to be properly customized during the manufacturing process.
Now that we understand why custom printed packaging is important, let’s dive into how to create custom packaging!
Corrugated boxes are digitally printed boxes to reveal the design that a seller intends to come out with. They are custom printed boxes using the machines that support such designs.
Everything is completely designed for custom print. Digital printers are used for product packaging.
Printing custom printed boxes is not that different from printing on paper. Inks are directly applied onto a substrate instead of print plates.
High quality graphics are depicted on the packaging boxes when the inks are thrown on substrates.
Limitronic’s V6 Color – Color Box Printer
Introducing the newest member of the Arrow family, Limitronic.
V6 Color, all color printer helps the users to box customization in real time. It also allows for short print runs and provides coding and decoration with just one system.
The machine has the capability to print at a speed of 02-192m/min, depending on the resolution. The printhead resolution is 180dpi and the printer stands tall at 72mm or 140mm.
V6 can be operated within 5 – 45° C. This printer comes with a 15” color touchscreen and integrated message editor.
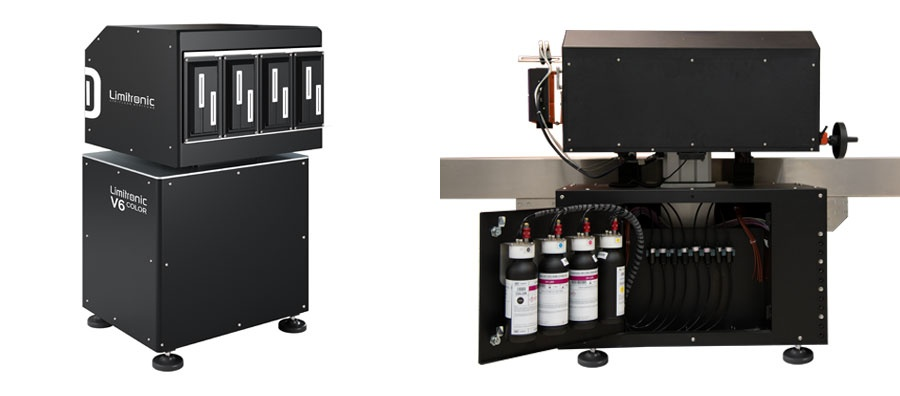
V6 Color comes with four different configurations and supports CMYK inks. Product boxes printed on corrugated cardboards are best experienced with Limitronic V6 Color printers.
Limitronic makes sure that their printers provide quality prints to the customers and eventually high quality printed boxes for a better customer experience.
V6 Standard – Spot Box Printer
The next printer that Limitronic has come up with is the V6 Standard printer.
With the provision of printing opposite faces and different heights, V6 standard also has a built-in message editor. These benefits help the print to reduce turnaround time and prove itself to be a cost effective printer.
Limitronic is backed by a great customer service, which Arrow Systems can also vouch for.
V6 Standard prints high quality barcodes with GS-1 standards. Digitally printed packaging on corrugated boards has never been easier, thanks to Limitronic’s V6 printers.
Not only does V6 support custom packages printed on cardboard boxes but also on porous, glossy, coated cardboards, paper, textiles, wood and plastic too.
V6 standard can also be operated at an environment of 5 – 45° C and needs a controller i.e IP 52. V6 Standard consists of two typefaces: True Type and Open Type. The print speed is extremely fast operating at 60m/min with 360 dpi.
Printing custom boxes on a V6 printer is very convenient. The CMYK inks are directly printed on almost any substrate and can be designed with detailed effects.
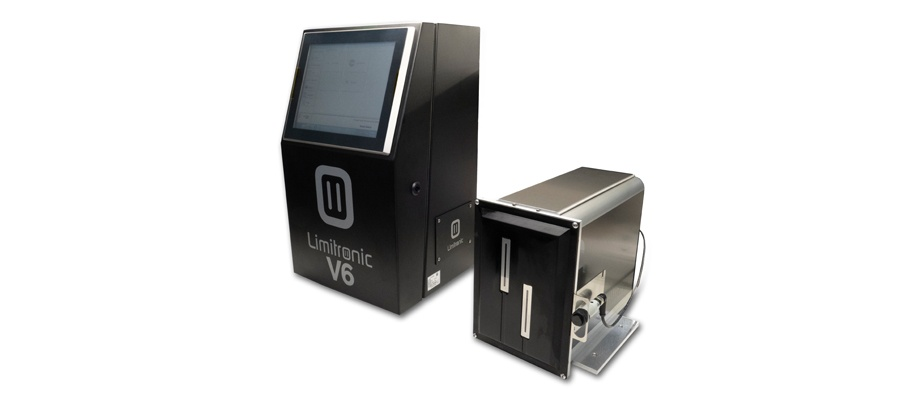
V6 saves the hassle of maintenance costs to its customers as it requires no maintenance.
To print custom packages with high quality, Limitronic’s V6 can paired with different print height which makes customization very easy.
The last in line, to help you understand how to customize your packaging, we bring to you Limitronic’s V7 Color printer.
V7 Color – Color Box Printer
V7 Color printer is a high speed inkjet printer, comes with single pass and offers compact design at a very low maintenance cost.
The V7 Color printer has the ability to print at a resolution of 360dpi. Like its peers V7 also has an integrated message editor.
V7 performs digital print on a variety of materials such as cardboards, textiles, paper, glossy boards etc.
Limitronic V7 does stand out in comparison to other inkjet printers. It comes with solvent-free inks, near to zero maintenance cost, on demand short-run printing and dries instantly.
To design custom boxes, the printhead height can be scaled up to 70mm. The V7 has 7 different intensity levels and can print as fast as 60 m/min.
Offset printing, die cut printing, Limitronic digitally prints customer orders according to its full potential that each printer carries.
Custom product packaging is the new trend and customers seem to enjoy the design that manufacturers come out with.
To check out all the printers that we offer for Limitronic, please check out the details here. (Link Limitronic printers page here.)
Please find different label printers that Arrow distributes here: https://arrsys.com/limitronic