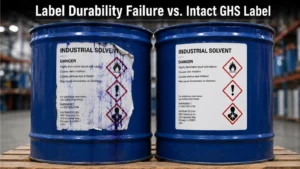
GHS Label Durability Failure: 4 Causes and Practical Fixes
Table of Contents GHS Label Durability Failure: 4 Causes and Practical Fixes GHS label durability failures trace to four causes: aqueous ink chemistry, paper face

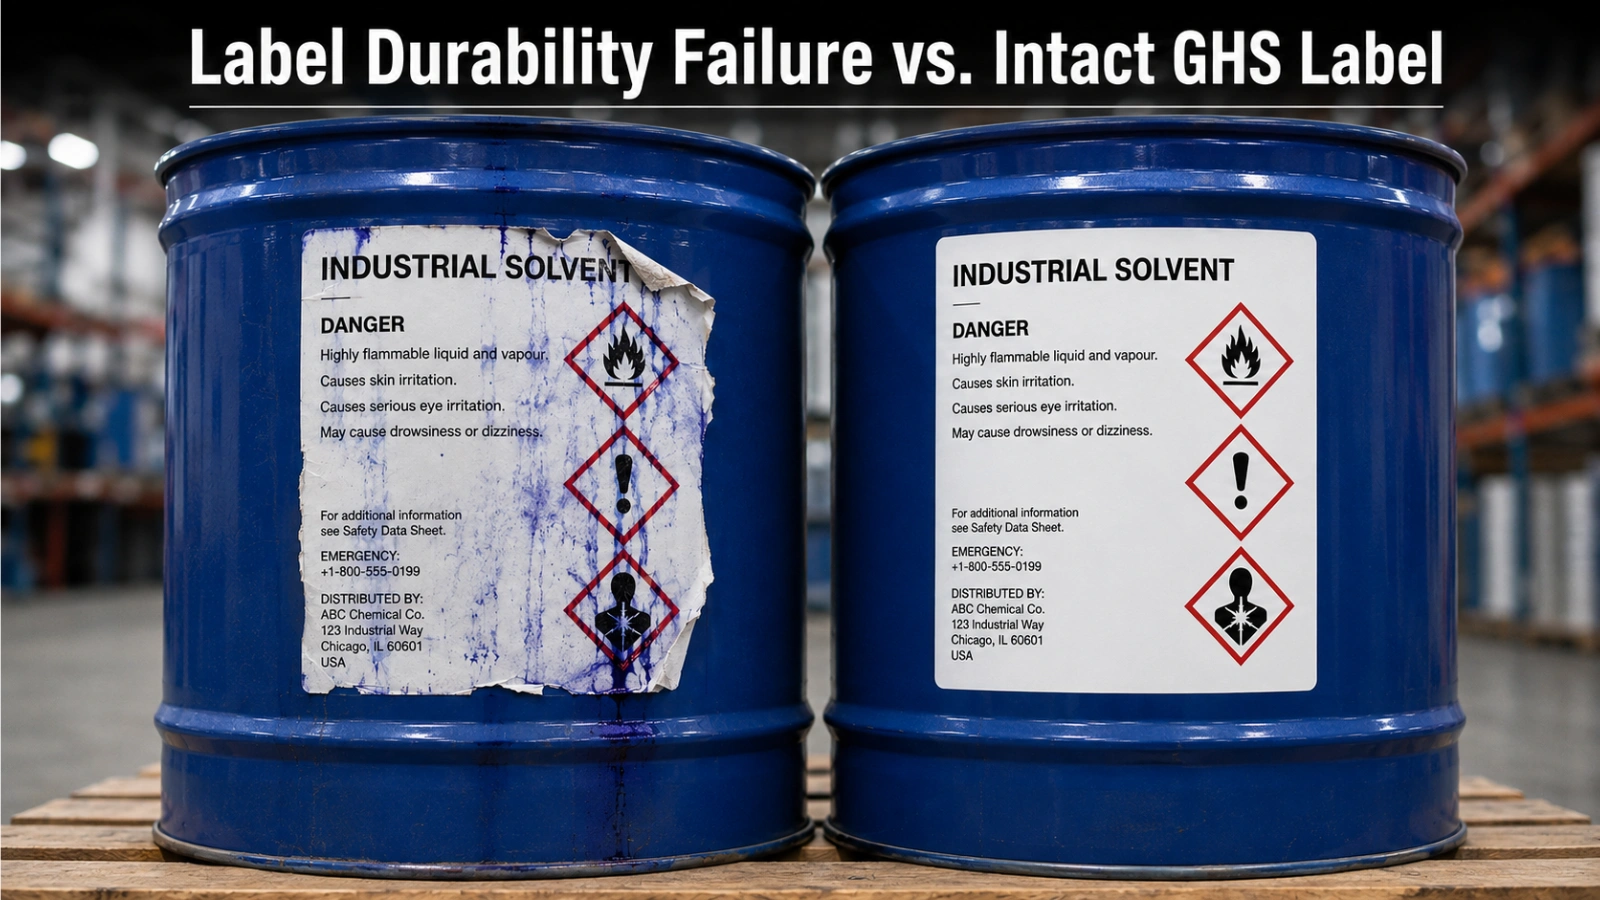
GHS label durability failures trace to four causes: aqueous ink chemistry, paper face stock, low-resolution pictograms, and adhesive mismatch.
Most GHS label durability failures start at the press, not at the container. The construction produced on your digital label printers — ink chemistry, face stock, print resolution, and adhesive — determines whether a compliant label survives the exposure conditions it’s about to face on a drum, pail, IBC, or cylinder. The same is true whether you’re running drum label printing, IBC label printing, or labeling pails and cylinders.
Under 29 CFR 1910.1200, GHS labels must stay legible and intact — OSHA does not prescribe a substrate, ink system, adhesive, or durability test.
HazCom 2012 label requirements start with 29 CFR 1910.1200: labels on shipped containers of hazardous chemicals must be legible, prominently displayed, and in English, though other languages may be added. The standard also requires that the information not be defaced or removed.
The HazCom 2012 GHS standard does not prescribe a substrate, ink system, adhesive class, or durability test protocol. Durability is framed as a performance obligation: the label has to stay legible and intact through normal conditions of use and handling. How you achieve that, and how you document it, is generally left to the chemical manufacturer, importer, or distributor. Confirm interpretation for your operation with your compliance team or regulatory counsel.
Where prescriptive criteria do appear, they usually come from outside OSHA:
Customer and distributor specifications
Downstream customers and distributors often set minimum resistance requirements to the chemistries being packaged, or require labels to survive receiving-dock wash-down before the container is accepted.
Export and marine routes
BS 5609 marine label testing is commonly referenced for IMDG-relevant labeling on containers that may see seawater immersion, abrasion, and weathering during export shipment.
Internal EHS standards
Some organizations set an internal label service life equal to the container’s service life, including for reconditioned or reusable drums and totes that go through multiple fill cycles.
In practice, receiving inspectors and auditors flag four things: imaging that has smeared or bled, substrate that has degraded, pictograms that have lost definition, and labels lifting off the container. Those map directly to the four failure modes below.
GHS label durability requirements beyond 29 CFR 1910.1200 — including customer specifications, BS 5609 marine criteria, and internal EHS standards — should be confirmed with your compliance team or regulatory counsel. Arrow Systems manufactures label printing hardware; Arrow does not provide regulatory or compliance advisory services.
Ghosted text and bleed patterns below a bung or valve point to aqueous ink or thermal transfer ribbon re-solvating on chemical contact.
Symptom on the container
Text and hazard statements look ghosted or feathered. Color has bled outside its boundaries. A wipe with a gloved hand leaves a smear on the glove. Damage is often localized in run patterns below a bung, valve, or fill point — the signature of contact rather than weathering.
What actually caused it
Water-based inkjet inks and non-resin thermal transfer ribbons stay re-wettable or thermally soft after printing. Alcohols, ketones, esters, and aggressive cleaners re-solvate the binder or mobilize dye colorants, and strong acids and caustics can break the binder down outright. Once the binder loses cohesion, imaging lifts off the film or wicks into paper fiber. Print quality problems in this category almost always trace back to imaging chemistry, not press setup.
How to confirm it in-plant. Run a screening comparison, not a certification test:
The correct specification fix. Move to UV-cured or resin-based imaging on a film face stock — ArrowJet UV label printers use LED-cure architecture that does not carry this re-wettable behavior — and specify a topcoat or overlaminate matched to the specific chemistry rather than to a generic “chemical resistant” claim. Ask your converter or internal print operation to document which chemistries the construction was screened against. If the container sees solvent immersion or seawater exposure, that documentation becomes the basis for a defensible spec.
Wicking at the edge, fiber tear, corner delamination, and yellowing all point back to paper’s hygroscopic nature in industrial handling conditions.
Symptom on the container
Wicking and darkening at the label edge. Fiber tear where a strap, forklift fork, or adjacent drum has rubbed. Curl and corner delamination after cold-warehouse cycling. Yellowing and brittleness on containers that sat in the yard through a summer.
What actually caused it
Paper is hygroscopic — it takes up moisture from condensation, humidity, and wash-down, swells, and loses tensile strength at the edges first. Freeze-thaw cycling between a cold warehouse and a warm dock accelerates delamination between face stock and adhesive. Outdoor storage adds photodegradation of both the paper and the colorants, which is the usual cause of fading when chemical and UV exposure combine.
How to confirm it in-plant.
The correct specification fix. Specify a film face stock sized to the thermal and abrasion profile:
Polypropylene (BOPP)
Good general moisture and mild-chemical resistance. Cost-effective for indoor pails and short-service drums.
Polyester (PET)
Higher tensile and dimensional stability, better abrasion and elevated-temperature tolerance. Common for drums and IBCs with outdoor exposure.
Polyimide and specialty films
Used for high-temperature, aggressive-solvent, or cylinder applications where PET performance is marginal.
Specify substrate and imaging together. Film surfaces differ in how well ink anchors, so changing face stock without validating print anchorage can create a new failure mode while solving the old one.
Soft symbol strokes and an uneven red border are a press and workflow issue — pictograms ship out looking marginal before any exposure occurs.
Symptom on the container
Thin black symbol strokes look soft or partially filled. The red diamond border is uneven in width, mottled, or broken at the points. Two pictograms are legible at arm’s length but not identifiable from across an aisle or rack bay.
What actually caused it
Pictograms are the least forgiving element on a GHS label. They depend on fine stroke weight, a consistent border, and strong black-on-white contrast inside a red frame. Low addressable resolution, dot gain that thickens strokes into each other, banding across the border, weak color management that shifts the red, and registration drift between color stations all degrade the symbol before any exposure occurs.
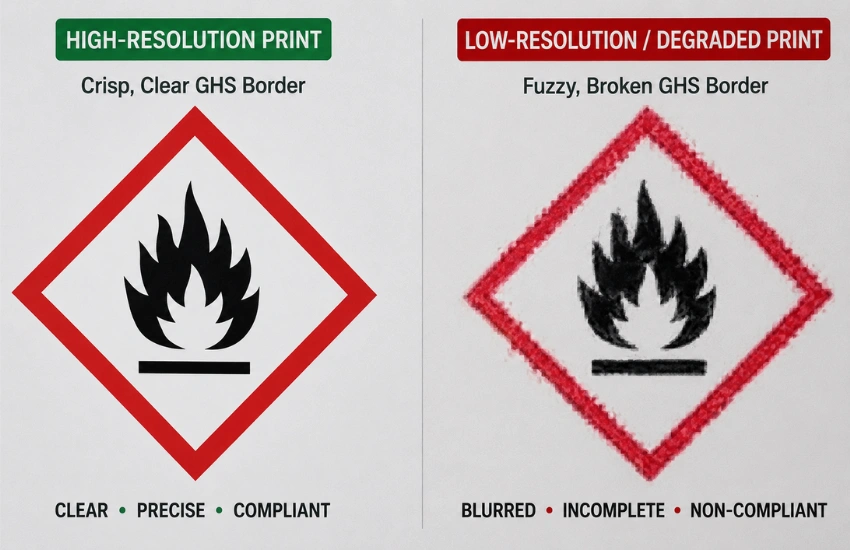
GHS pictogram resolution is not a matter of opinion — it’s measurable against stroke weight, border width, and contrast.
How to confirm it in-plant. Build pictogram checks into first-article approval:
The correct specification fix. Print pictograms with high-resolution digital imaging under documented color management, from controlled artwork masters that cannot be rescaled or recolored at the plant level. Auditors notice red border integrity and symbol edge definition before anything else on the label, so treat both as measurable acceptance criteria rather than subjective judgment.
Most chemical label adhesive failure is a surface-energy or application-condition problem — not proof the adhesive itself is weak.
Symptom on the container
Edge lift and corner flagging within days of application. Full peel on ribbed HDPE pails. Labels that survive on steel drums but fail on the same product’s plastic containers. Failures concentrated on curved, small-diameter surfaces such as cylinders and narrow-neck containers.
What actually caused it
Untreated polyethylene and polypropylene are low-surface-energy materials that resist wet-out. Powder-coat texture, mold release residue, dust, and oil films reduce contact area. Cold containers pulled straight from a chilled warehouse prevent the adhesive from flowing before the label is handled. A stiff face stock on a tight radius also stores enough spring-back energy to peel itself at the edge.
How to confirm it in-plant. Run a controlled dwell comparison across container types:
The correct specification fix. Select adhesive class against surface energy and minimum application temperature, not against a general “aggressive” claim. Match face-stock stiffness to the smallest radius the label must conform to. Add a documented application procedure covering surface cleaning, minimum container temperature, and roller or squeegee pressure. Many labels blamed on adhesive were applied outside the adhesive’s working window.
Document the exposure profile for each container type before specifying any construction — use this table as a starting filter, not a final verdict.
Chemical label substrate selection should follow documented exposure data, not habit or whatever construction is already on the shelf.
Before specifying any construction, document the exposure profile for each container type:
Container / Exposure | Typical Face Stock | Imaging Approach | Adhesive Considerations |
Steel drum, indoor, low splash | BOPP film | UV-cured or resin imaging | General-purpose permanent, clean surface |
Steel drum, outdoor yard storage | PET with UV-stable overlaminate | UV-cured, controlled color management | High-shear permanent, verify on powder coat |
HDPE pail, ribbed or textured | Conformable film, lower stiffness | UV-cured with topcoat | Low-surface-energy adhesive, radius-matched |
IBC panel, wash-down exposure | PET | UV-cured plus chemical-matched laminate | Permanent, moisture-resistant edge performance |
Cylinder, small diameter, abrasive handling | PET or specialty film | UV-cured, abrasion-resistant topcoat | High-tack, conformable, edge-sealed |
Export / marine route | Film construction screened against relevant criteria | UV-cured, documented | Verify requirements against BS 5609 expectations with your compliance team |
Treat this as a starting framework for discussion with your material supplier. Final selection should always be screened against your actual chemistries and handling.
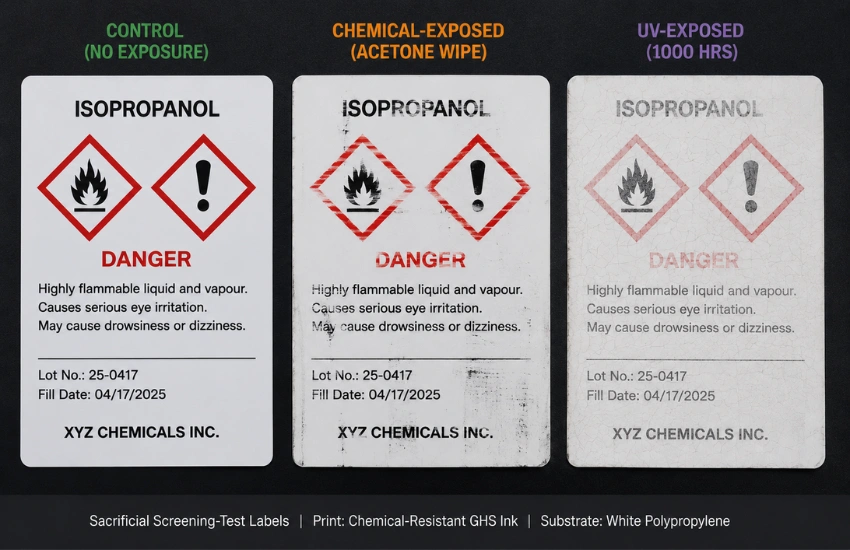
The ArrowJet UV 330H applies UV inkjet printing to the root causes of GHS label failure rather than patching them downstream.
The ArrowJet UV 330H is Arrow’s UV inkjet label printing platform. Arrow Systems is a manufacturer of digital label printing and finishing equipment — Arrow does not print or supply labels on a customer’s behalf.
For teams evaluating a dedicated drum label printer for GHS-compliant output, here’s how the UV 330H addresses each failure mode:
UV-cured imaging on film substrates — addresses Error 1
UV-curable ink cures rather than dries, so imaging does not retain the re-wettable behavior that causes aqueous ink to smear on solvent contact. The UV 330H’s UV LED printing technology supports both roll-to-roll and flatbed printing modes, giving that cured-ink anchorage on the film face stocks that Error 2’s fix calls for.
High-resolution imaging for pictogram fidelity — addresses Error 3
The UV 330H runs 14 Ricoh Gen6 piezo inkjet printheads at a maximum resolution up to 720 x 4800 dpi with a minimum droplet size of 5 picoliters, managed through an Onyx RIP workflow. That combination is what supports the fine stroke weight, consistent red border, and strong black-on-white contrast a GHS pictogram requires.
Substrate and construction freedom — addresses Error 4 and reinforces Error 2
Because the UV 330H prints up to 330 mm wide on roll media up to 350 mm and also handles rigid media up to 50 mm thick in flatbed mode, you can specify the construction the chemistry demands — polypropylene, PET, or a specialty film with the topcoat and adhesive class the container surface requires — instead of adapting the spec to whatever pre-printed stock is on the shelf.
Inline white ink and varnish configurations
The UV 330H supports CMYK + White, CMYK + Varnish, and CMYK + White + Varnish configurations. The inline varnish layer adds a clear protective coat at print time — worth evaluating alongside a dedicated overlaminate for chemistries where the screening check in Error 1 calls for extra protection.
On-demand short-run production for spec and SDS revisions
Because production is not tied to a large pre-printed inventory, a durability review or an SDS revision that changes hazard statements can move into production without writing off existing label stock. The UV 330H also supports variable data printing for barcodes and QR codes, useful where lot- or container-specific identifiers need to print alongside static GHS content.
Diagnose the damage pattern, specify substrate, ink, topcoat, and adhesive as one system, and document the application procedure before reprinting.
Step 1: Diagnose the failure mode from the damage pattern
Match the symptom on the container against the four failure modes above before changing artwork or adding an over-label. The damage pattern — localized bleed, edge wicking, soft pictogram detail, or edge lift — points directly to the underlying cause.
Step 2: Specify substrate, ink, topcoat, and adhesive as one system
Screen the full construction against your actual chemistries, not element by element. Ink anchorage and adhesive performance both vary by film surface, so changing one part without validating the rest can introduce a new failure mode while solving the old one.
Step 3: Make pictogram border integrity and symbol definition measurable acceptance criteria
Build red-border width and symbol fill checks into first-article approval, and record pass/fail against a locked artwork master rather than relying on a subjective read of the previous production run.
Step 4: Document surface prep, minimum container temperature, and application pressure
Write down the application procedure — surface cleaning, minimum container temperature, and roller or squeegee pressure — since many adhesive failures trace back to labels applied outside the adhesive’s working window.
Step 5: Move corrected labels into production on demand
Once the construction is validated, on-demand short-run printing gets the corrected label into use without carrying or writing off an inventory of the old version.
Common questions from ops, packaging, QA, and EHS teams troubleshooting GHS label durability failures on drums, pails, IBCs, and cylinders.
No. Under 29 CFR 1910.1200, labels on shipped containers must be legible, prominently displayed, and in English, and the required information must not be defaced or removed. OSHA does not prescribe a substrate, ink system, adhesive, or test protocol — durability is treated as a performance obligation on the chemical manufacturer, importer, or distributor. Customer specifications and export routes, including BS 5609 references for marine shipments, often add stricter documented requirements, so confirm your specific obligations with your compliance team or regulatory counsel.
Look at the damage pattern. UV fade is uniform — color shifts consistently across the whole label face, reds and magentas typically weaken first, and the substrate may yellow or embrittle evenly. Chemical attack is localized and irregular, showing streaks or blotches near a bung, valve, or fill point where a drip or splash landed. Comparing the failed label against an unexposed control from the same lot makes the distinction clearer, and if both patterns appear together, specify a construction that addresses UV stability and chemical resistance at the same time.
A polyester (PET) face stock with a UV-stable overlaminate and UV-cured imaging is a common starting point for outdoor yard storage, since PET offers dimensional stability, abrasion resistance, and better weathering than paper or lower-grade films. Polypropylene can work for shorter service lives or milder exposure. Substrate, ink, and topcoat should be specified as one system — ink anchorage varies by film surface, so changing one element without screening the whole construction can introduce a new failure mode.
Powder-coated drum label adhesion problems are usually not about adhesive tack. Powder-coat surfaces are textured, which reduces actual contact area, and they can carry release agents or process residue that prevent wet-out. Cold container temperature at application is another frequent cause, since the adhesive never flows enough to build bond strength before the drum is handled, and face-stock stiffness on curved surfaces adds spring-back that concentrates stress at the label edge. Fix it by matching adhesive class to surface energy and minimum application temperature, using a conformable face stock, and documenting surface prep and application pressure in a written procedure.
If your team is troubleshooting a GHS label durability failure — or specifying construction for a new drum, pail, IBC, or cylinder program — Arrow Systems can print label samples on your candidate substrate, ink, and topcoat construction using the ArrowJet UV 330H.
Bring your failed label and the exposure profile of the container it came off. We’ll show you how the UV 330H handles the substrate and ink system your specification calls for, so you can screen it against your actual chemistries before committing to a production run.
Table of Contents GHS Label Durability Failure: 4 Causes and Practical Fixes GHS label durability failures trace to four causes: aqueous ink chemistry, paper face

Table of Contents White Ink Clear Label Printing: When You Need It and Why White ink under clear film keeps brand color, mandatory copy, and
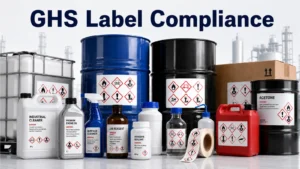
Table of Contents GHS Label Compliance: A Practical Guide for Chemical Label Printing GHS label compliance is a safety-critical requirement for any business that manufactures,
Table of Contents Cannabis MSO Label Printing: In-House or Outsource? Cannabis MSO label printing moves in-house when label versions outgrow converter minimums or batch data
Table of Contents Why Print Your Own Product Labels: Speed, Control, and On-Demand Flexibility In-house digital label printing removes outsourcing delays, eliminates minimum order quantities,
Table of Contents Craft Brewery In-House Label Workflow: Design File to Roll An in-house brewery label workflow is a four-step chain: controlled artwork, a calendar-driven