Table of Contents
Craft Brewery In-House Label Workflow: Design File to Roll
An in-house brewery label workflow is a four-step chain: controlled artwork, a calendar-driven queue, roll-fed digital printing, and finishing to spec.
Key Takeaways
- In-house label production closes the gap between brewhouse speed and converter lead time — collabs, seasonals, and taproom-only SKUs are scheduled in weeks, not the multiple weeks plus freight that converter minimums require.
- A controlled artwork library with one named owner per SKU and a documented TTB approval gate is the precondition for everything downstream — no press or workflow makes a label compliant on its own.
- The label queue should follow the packaging calendar, not a procurement forecast, with run size tied to planned cases plus an overage figure set from observed setup waste on the actual line.
- Roll-fed digital printing on the ArrowJet Aqua 330R removes plates and dies from the changeover, making it practical to run a core SKU, a keg collar batch, and two variety-pack labels back to back on one roll.
- Finishing is where in-house programs most often stall — the rewind spec (direction, core size, labels per roll, maximum diameter) has to match the applicator or mobile canner exactly, confirmed in writing before the first run.
- The economics favor exceptions: a single very-high-volume flagship at a stable design, heavy metallic effects, and shrink sleeves generally still make more sense with a converter.
Why Craft Breweries Bring Label Production In-House
Converter minimums and multi-week lead times were built for stable, high-volume SKUs — a pattern craft beer’s release calendar stopped matching some time ago.
A collab IPA that is tank-ready in nine days does not wait well for a converter quoting a multi-week lead time plus a die charge. The result is a familiar choice: push the release, pour it all on draft, or absorb rush and freight fees on a run sized for a batch that finishes in one canning session. An in-house workflow exists to close that specific gap between brewhouse speed and label lead time. For craft beer can label printing specifically, the gap shows up first on 12 oz and 16 oz core runs, then compounds across every seasonal and collab SKU behind them.
Minimums do not match batch sizes
A converter minimum sized for a year-round flagship does not fit a single-batch fresh hop ale, a festival-only pour, or a taproom crowler run.
Lead times do not match release calendars
Collabs get scheduled in weeks, and seasonal drops shift when a fermentation runs long or a mobile canner reschedules.
Version sprawl compounds fast
Six core SKUs across 12 oz and 16 oz cans, a rotating seasonal slot, occasional 22 oz bombers, keg collars, and a variety pack needing four versions in one window means dozens of live files, not six.
Obsolescence is the quiet cost
An ABV correction after final gravity, a recipe tweak, a distributor requirement, or a rebrand turns the remaining boxes on the rack into scrap.
Where In-House Labeling Does Not Pay Off Yet
Be honest about the exceptions. If one flagship SKU consumes very high annual label volumes at a stable design, conventional flexo procurement usually still wins on unit cost. Heavy metallic effects, textured or specialty stocks, and elaborate cold-foil treatments are often better left with a converter.
Shrink sleeves are a different process entirely — full-wrap coverage and 360-degree graphics require dedicated application equipment and steam or heat tunnels, so most breweries that print in-house do it for pressure-sensitive labels and keep sleeves outsourced. A practical split: leave the highest-volume core brand with the converter, and bring seasonals, collabs, variety-pack components, keg collars, and taproom-only SKUs in-house.
Outsourced vs. In-House Label Production: Side-by-Side Comparison
Outsourced procurement is order-date driven and buys ahead of demand; an in-house workflow is packaging-calendar driven and prints behind confirmed demand.
Factor | Outsourced Label Procurement | In-House On-Demand Workflow |
Lead time | Multiple weeks in most quotes, plus freight | Days; often the same week |
Minimum quantity | Converter minimum per SKU | The quantity the batch actually needs |
Version control | Split across email, PO, and vendor proofs | Single controlled artwork library |
Obsolescence risk | Higher, because labels are bought ahead of demand | Lower, because printing follows confirmed demand |
Schedule flexibility | Order-date driven | Packaging-calendar driven |
Treat this table as a starting filter, not a verdict. A single high-volume flagship at a stable design, and shrink sleeves generally, still favor the outsourced column.
Step 1: Managing TTB-Reviewed Design Files Across Multiple Beers
Nothing downstream works if the file layer is loose — build a controlled artwork library before evaluating presses, with mandatory content locked and one named owner per SKU.
TTB beer label requirements — set by the U.S. Alcohol and Tobacco Tax and Trade Bureau — govern what beer labels must carry, and state agencies may add their own requirements. Printing in-house changes who produces the label, not what the label must contain or which approvals apply. Separately, federal TTB COLA requirements (Certificate of Label Approval) apply before a new or revised label can be used — the artwork approval gate below supports that process but does not replace it.
Lock one template per package format
Keep separate templates for 12 oz can, 16 oz can, 22 oz bomber, crowler, and keg collar. Each carries its own die line, bleed allowance, and safe area, because a 16 oz wrap is not a scaled 12 oz wrap.
Treat mandatory content as controlled fields, not free-form art
Content breweries generally manage includes brand name, class or type designation, net contents, name and address, alcohol content where applicable, the government warning statement, and allergen or other declarations where they apply. Build these as locked fields so a designer cannot rescale or reflow them while adjusting a hop illustration.
Set an approval gate ahead of the print queue
No file enters the queue without documented sign-off from the person responsible for brand and regulatory review at the brewery. If a field changes, the revision goes back through the gate.
Assign one named owner per SKU
Not a team, not a shared inbox. One person answers the question, “what is the current file for the winter lager?”
Enforce file hygiene
Deliver print-ready PDFs with correct bleed and a defined die line, spot colors for brand marks where run-to-run consistency matters, process color for photographic and illustrative elements, preserved barcode quiet zones, and small-point regulatory text checked at final print size rather than on screen at 400 percent.
Name and log revisions
A convention such as BREWERY_SKU_ABV_REV — for example NORTHGATE_HAZYIPA_6.8_R4 — makes the current version obvious at a glance. Keep a revision log with date, change description, and approver.
Archive retired versions out of the print path
Move superseded files to a locked archive folder so an old ABV or outdated layout cannot be pulled by mistake on a busy canning morning.
Printing in-house changes who produces the label, not what the label must contain or which approvals apply. Confirm current federal and state labeling requirements with a regulatory advisor or the applicable agencies before changing label content or an approval process. Arrow Systems sells label printing and finishing hardware; Arrow does not provide regulatory or compliance advisory services.
Step 2: Scheduling Seasonal and Limited Runs Without Label Inventory
Once files are controlled, the packaging calendar label queue should replace a procurement guess made months in advance.
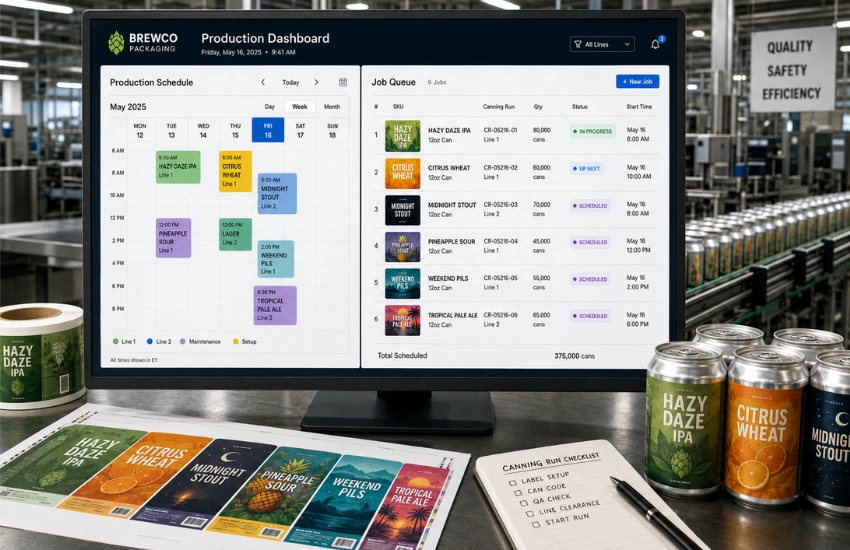
Trigger jobs from the packaging schedule
When a canning date lands on the calendar, a label job for that SKU should appear in the queue with a target print date a few days ahead. That buffer covers finishing, a first-article review, and a reprint if something needs correcting, without creating shelf inventory.
Size the run to the batch
Calculate planned cases multiplied by labels per case, then add a defined overage for applicator threading, setup waste, and line loss. Overage varies by applicator, label size, and crew experience, so set the figure from observed setup waste on the brewery’s own line rather than a rule of thumb, and widen it for a first-time can format or a new mobile canner.
Batch same-substrate jobs
If a winter seasonal, a collab, and two variety-pack components share the same face stock and adhesive, sequence them in one production window to cut changeover time and material threading. Save specialty stock for its own block.
Let operations automation carry the handoff
When a production planning or brewery management system publishes the packaging schedule, that schedule should generate label jobs with SKU, revision, and quantity attached, instead of relying on an email a designer may not read before Friday. Every job then carries a traceable link back to a batch and a packaging date.
Step 3: Running the Job on a Roll-Fed Digital Press
With a queued job and an approved file, the press run itself is short and procedural — four checks precede every batch.
Beer labels live a wet life: condensation off the filler, cooler humidity, ice baths, and hands in a slushy tub. The pre-run checks below exist to catch problems before material is committed.
Substrate and adhesive suitability
Confirm the face stock and adhesive are specified for cold, damp application and cold-chain storage rather than assuming a dry-goods stock will hold.
Color profile recall
Pull the saved job settings for that SKU so a flagship printed in March lands close to the same run in October.
Print-head and nozzle check
Standard start-of-run verification before committing material to the run.
First-article pull
Print a short lead, cut a single label, and compare it side by side with the approved proof for brand color, barcode scan, and legibility of small regulatory text at actual size. The named SKU owner or packaging manager signs off before the full run proceeds.
Because there are no plates or dies to change on a digital press, a brewery can run a 16 oz hazy IPA, a keg collar batch, and two variety-pack labels back to back on one roll of the same substrate — the operational difference between short-run digital printing and conventional procurement. Record the job as it runs: SKU, revision ID, quantity produced, operator, date, and the batch and packaging date it serves. That record is what answers, six months later, exactly which file produced which labels.
Step 4: Finishing, Die-Cutting, and Rewinding to Applicator Spec
A printed web is not a usable label roll yet — finishing is where most in-house programs either click or stall on canning day.
Laminate or varnish
Choose an overlaminate or coating with the moisture and abrasion resistance the handling demands. Cans that pass through a packaging line, a cooler, and a customer’s ice chest see more scuffing than a bomber sitting on a shelf.
Die-cutting method
Rotary tooling is efficient for shapes that repeat, such as standard 12 oz and 16 oz body labels. Digital or laser cutting avoids new tooling for a one-off shape, an odd crowler wrap, or a keg collar whose outline changes from release to release.
Slitting and rewinding
This is where rolls get rejected. Match rewind direction, core size, labels per roll, and maximum roll diameter to the applicator on the labeler or to whatever the mobile canner brings.
Label the finished rolls
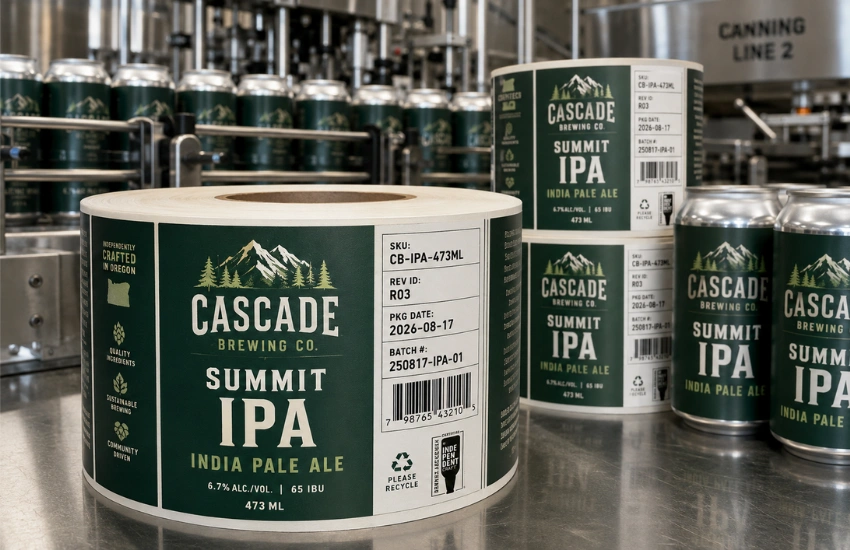
Every roll should carry SKU, revision ID, count, and the batch or packaging date it was produced for, so the line lead can verify at startup instead of trusting a hand-scrawled sticker.
Stage rather than warehouse
Distribution SKUs may need a short buffer, while taproom one-offs should not sit at all. Keep rolls in a clean, temperature-stable area away from floor drains and washdown zones.
Get the rewind spec in writing from the co-packer or applicator manufacturer before the first run — a technically perfect label on the wrong rewind is unusable on canning morning.
Who Owns What in the Label Chain
Unclear ownership is the most common failure mode, so write it down.
Designer
Builds to the locked template and delivers a print-ready PDF with correct die line and bleed, with no field edits without approval.
Brand and regulatory reviewer
Holds the approval gate and signs off on any change to mandatory content fields.
Packaging manager
Owns the label queue, run sizing, sequencing against canning dates, and the revision log.
Press and finishing operator
Runs pre-run checks and the first-article pull, sets roll spec, labels rolls, and closes the job record.
Line lead
Verifies the roll label against the work order at startup and flags mismatches before the filler runs.
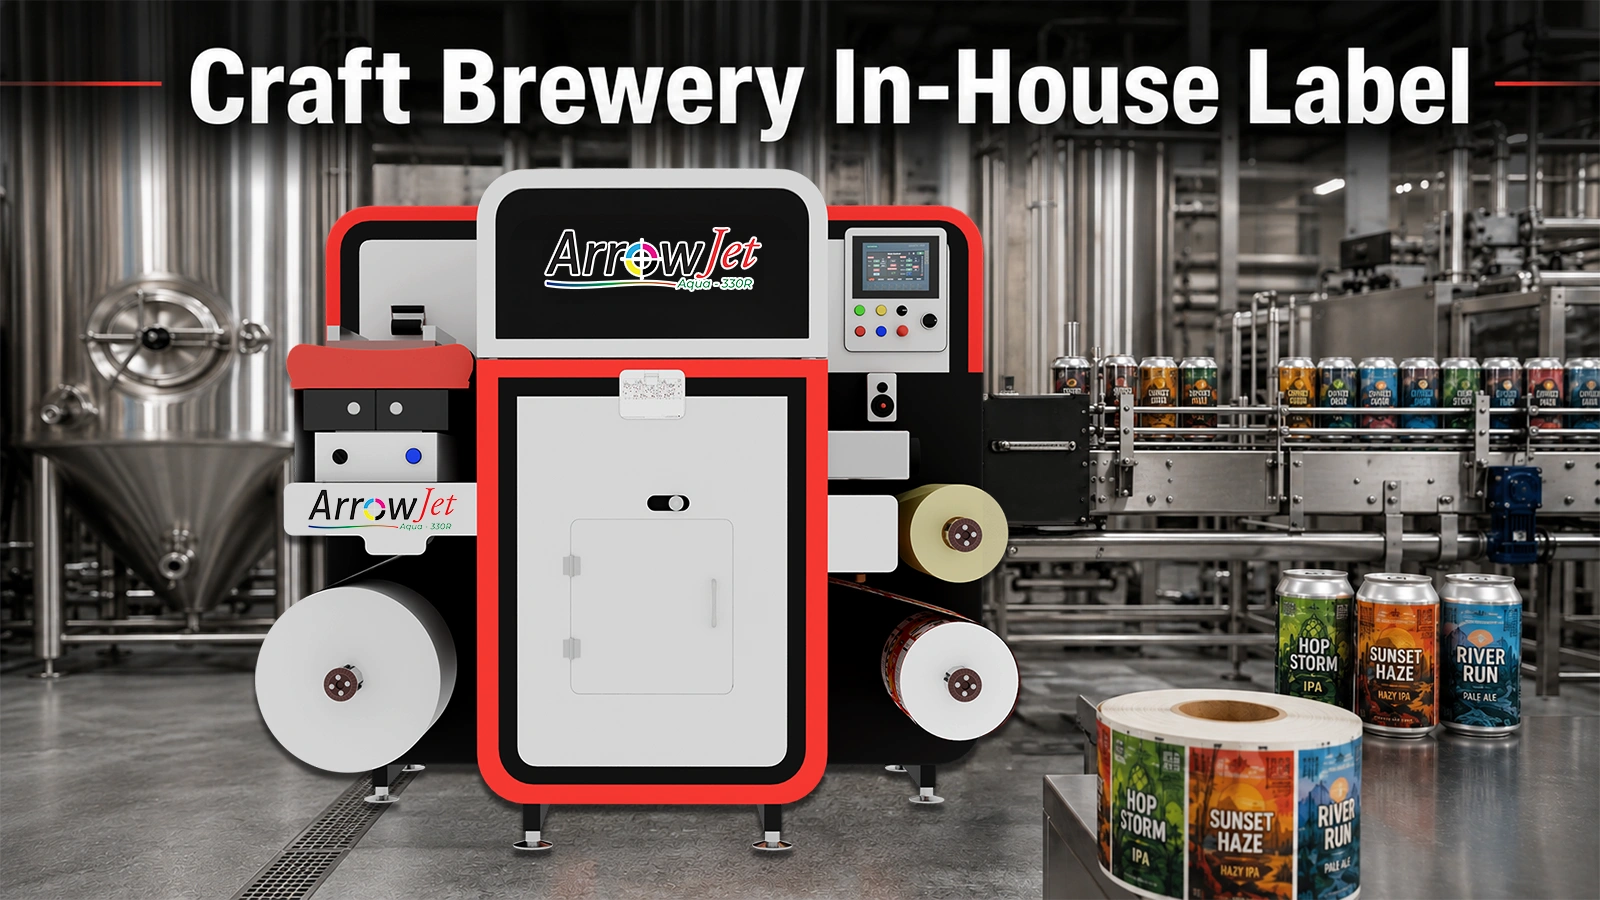
The ArrowJet Aqua 330R: How It Fits a Brewery Label Workflow
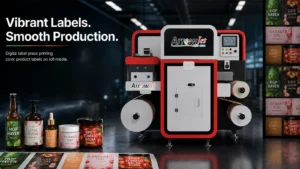
A 330 mm roll-fed, water-based inkjet label press built for short and mid-length runs and frequent SKU changes — the pattern a calendar-driven brewery queue produces.
As an in-house label printer purpose-built for roll-fed brewery production, the ArrowJet Aqua 330R, from Arrow Systems, is built on Memjet’s DuraFlex® printhead technology and runs at three speed tiers — 90, 150, and 195 ft/min — on a maximum media width of 380 mm, powered by a three-phase 220V/400V supply. It’s built for food and beverage production and is Nestlé Guidance Compliant.
Queueing multiple beer SKUs on a shared substrate
Core, seasonal, collab labels, and keg collar label printing run back-to-back in one production window when they share face stock and adhesive — the batching pattern described in Step 2 above.
Job changeover without plates or dies
Digital printing removes the tooling cost and setup time that make single-batch and taproom-only quantities impractical on conventional flexo equipment.
On-demand run sizes tied to planned cases plus setup overage
Runs are sized to the batch rather than a converter minimum, matching the sizing method described in Step 2.
Pairing with near-line finishing
The press pairs with Arrow’s finishing range for laminating, die-cutting, slitting, and rewinding to the applicator’s spec — see the finishing options below.
Configuration drives outcomes more than any headline claim. Confirm four things during evaluation: substrate and adhesive options suited to cold, condensating cans; finishing configuration and die-cut approach for the brewery’s package formats; color management method for repeatable brand marks; and how the press queue would connect to the brewery’s production planning and operations automation stack. Request configuration details and substrate testing on the brewery’s actual materials rather than relying on general capability statements.
Finishing Equipment for Brewery Label Production
Rotary blade cutting suits repeat can-label shapes at volume; die-free laser cutting suits keg collars and crowler wraps whose outline changes release to release.
Arrow’s label finishing systems support custom die cut label printing through label die-cutting, lamination, and rewinding for roll-fed digital label output, matching the finishing requirements described in Step 4 above.
Arrow EZCut 330R+ — flatbed and roll-to-roll hybrid blade die cutting
The EZCut 330R+ is a flatbed label die cutting machine with roll-to-roll hybrid capability, a maximum cutting width of 350 mm, cutting accuracy of ±0.1 mm, and a maximum speed of 150 cuts per minute. It supports self-adhesive, PP synthetic, PET, PVC, aluminum plastic film, and flexible materials, with cold lamination available inline — a fit for breweries mixing standard can-label runs with the occasional flatbed or specialty job.
Arrow EZCut 350R — higher-throughput multi-blade roll-to-roll cutting
The EZCut 350R is a rotary label die cutting machine and dedicated roll-to-roll digital label cutting machine with up to 6 cutting heads, a cutting speed of 9 m/min, slitting speed up to 100 m/min, and die-cutting precision of ±0.1 mm across a maximum label width of 330 mm. Rotary tooling like this is efficient for shapes that repeat — the standard 12 oz and 16 oz body labels that make up most of a core SKU’s volume.
ArrowCut Nova — CO₂ laser finishing for custom shapes
The ArrowCut Nova 330R and ArrowCut Nova 250R are laser label die cutters that cut without physical dies, enabling custom shapes, kiss cut labels, perforations, and etching. Laser finishing avoids new tooling for a one-off shape — well-suited to an odd crowler wrap or a keg collar whose outline changes from release to release, where the cost of a label cutting die cannot be amortized across a single-batch print run.
Frequently Asked Questions About In-House Beer Label Printing
Common questions from brewery packaging managers, production leads, and owners evaluating an in-house label workflow.
There is no single volume threshold — SKU count and revision frequency matter more than total volume. Breweries with many low-volume SKUs, frequent seasonals, and regular collabs often reach a practical case earlier than a brewery with two high-volume flagships, because the savings come from eliminated minimum-order overbuys, avoided rush and freight charges, and less obsolete inventory rather than unit price alone. Model annual label spend, scrapped label percentage, rush fees, and the schedule risk carried when labels arrive late.
Yes. Moving production in-house changes who prints the label, not what the label must contain or which approvals apply. The same mandatory content elements and review expectations that governed converter-printed labels continue to apply, which is why a locked artwork template and a formal approval gate matter more once printing is fast and internal. Confirm current federal and state requirements with a regulatory advisor or the applicable agencies before altering label content or an approval process.
Many breweries print a few days before the packaging date — long enough to laminate, die-cut, rewind, pull a first article, and reprint if something needs correcting, yet short enough that a late ABV adjustment or artwork change does not turn finished rolls into scrap. Build a longer buffer around mobile canning or co-packing dates, where the brewery controls the schedule less, and around first runs of a new package format or applicator setup.
Map Your Label Chain Before You Change Equipment
Start with a brewery label workflow audit, not a quote — five takeaways to act on this quarter.
- Document, per SKU, the artwork owner, where the approval gate sits, what triggers a label order today, and the lead time actually experienced.
- Record the exact roll spec the applicator or mobile canner requires, including rewind direction, core size, labels per roll, and maximum diameter.
- Total last year’s scrapped labels, rush fees, and freight charges so the business case rests on the brewery’s own data rather than unit price.
- Lay the audit against the next 90 days of core, seasonal, and collab releases, then pick the two or three SKUs where short-run in-house printing removes the most schedule risk.
- Evaluate presses against substrates, finishing needs, and the planning stack — not against general capability claims.
Get a Brewery Label Workflow Assessment from Arrow Systems
Arrow Systems can turn a label chain audit into a structured assessment covering SKU count and run sizes, substrate and adhesive requirements for cold and wet can handling, finishing and rewind specifications for the applicator or mobile canner, and how the ArrowJet Aqua 330R with near-line finishing would fit a brewery’s packaging schedule and operations automation stack.
The output is a tailored equipment configuration plan — not a print-services quote.
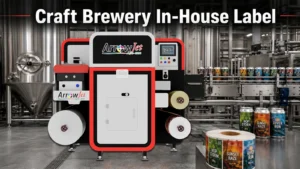
Craft Brewery In-House Label Workflow: Design File to Roll
Table of Contents Craft Brewery In-House Label Workflow: Design File to Roll An in-house brewery label workflow is a four-step chain: controlled artwork, a calendar-driven
Aqueous vs. UV Inkjet Pharmaceutical Labels: What GMP Requires
Table of Contents Aqueous vs. UV Inkjet Pharmaceutical Labels: What GMP Requires No FDA regulation names a compliant ink chemistry — GMP governs label accuracy,
Color Sticker Printer for Business: 4 Reasons to Print In-House
Table of Contents Color Sticker Printer for Business: 4 Reasons to Print In-House Businesses invest in a color label printer to reduce dependence on outside
Digital Label Printer for a Small Brand: The Real Break-Even Math
Table of Contents Digital Label Printer for a Small Brand: The Real Break-Even Math Break-even for an in-house digital label press is driven by SKU
Color Label Printer Benefits: A Practical Guide for Businesses
Table of Contents Color Label Printer Benefits: A Practical Guide for Businesses A color label printer gives businesses on-demand control over label production — from

Cosmetic Label Adhesion Problem: Bubbling and Lifting on Glass
Table of Contents Cosmetic Label Adhesion Problem: Bubbling and Lifting on Glass Cosmetic label bubbling and label lifting on glass trace to four variables: surface